

Poor weld joint preparation is one of the most expensive mistakes a fabrication shop can make. A missed cleaning step, a root gap that’s off by a fraction, or a bevel angle that’s slightly wrong can cascade into porosity, lack of fusion, and cracked welds that require full removal and re-welding. Rework doesn’t just cost time. It costs material, labor, and sometimes a customer relationship. This guide gives professional welders and shop managers a practical, step-by-step framework for joint preparation that holds up under production pressure, meets AWS standards, and reduces defects before the arc ever strikes.
Table of Contents
- What you need before starting weld joint prep
- Step-by-step weld joint preparation process
- Fine-tuning joint fit-up and tolerances
- Verification, post-prep, and the role of continuous improvement
- What most guides miss about real-world weld joint preparation
- Equip your shop for flawless weld prep
- Frequently asked questions
Key Takeaways
| Point | Details |
|---|---|
| Proper tools matter | Using the right prep equipment and consumables ensures joint quality and safety. |
| Control fit-up tolerances | Stick to tight gap and angle tolerances to avoid defects and rework during welding. |
| Continuous improvement | Inspect and refine your process regularly to boost weld strength and reduce failure rates. |
| Cleanliness is critical | Clean all joint surfaces thoroughly before welding to prevent contamination and weak welds. |
What you need before starting weld joint prep
With a clear understanding of why joint preparation matters, the next step is ensuring you have everything required for success. Rushing into prep without the right tools or materials is a shortcut to inconsistent results.
Essential tools for weld joint prep
| Tool | Application |
|---|---|
| Angle grinder | Beveling, oxide removal, cleaning |
| Wire brush (stainless for SS/Al) | Surface cleaning, inter-pass cleaning |
| Plasma cutter | Precision cutting on complex joints |
| Fit-up gauges | Measuring root gap and bevel angles |
| Chipping hammer | Slag removal on SMAW joints |
| Soapstone / scribe | Joint marking |
For aluminum and stainless steel joints, industrial plasma cutters or waterjet cutting are strongly preferred over carbon-arc gouging. Carbon-arc introduces carbon pickup into the base metal, which contaminates the weld zone and causes brittleness.
Consumables and materials checklist
- Flap discs and grinding wheels (60 to 120 grit range)
- Dedicated stainless steel wire brushes (never share with carbon steel)
- Acetone or approved cleaning solvent for degreasing
- Anti-spatter compound
- Tack weld consumables matched to base metal
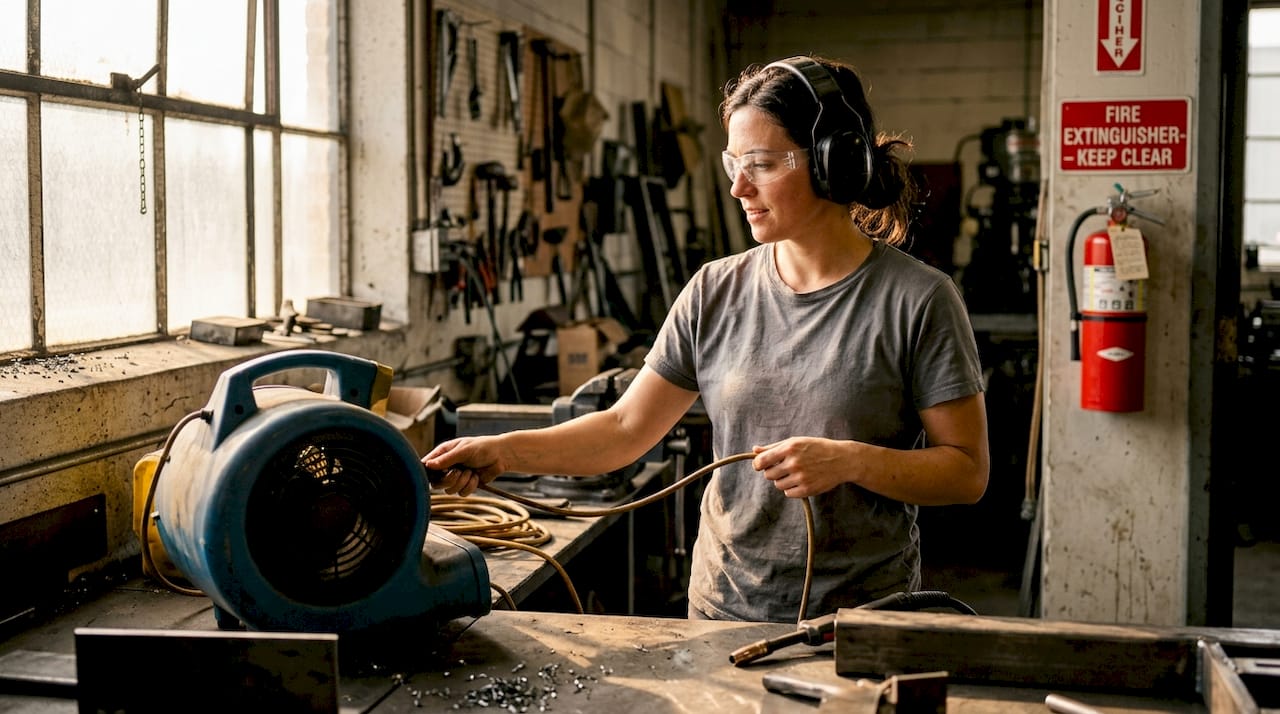
Safety PPE requirements
- Auto-darkening welding helmet (shade 9 to 13 depending on process)
- Heat-resistant gloves
- Safety glasses with side shields
- Leather apron or FR-rated jacket
- Respiratory protection when grinding or cutting coated metals
Your workspace must have adequate ventilation, especially when working with solvents or grinding coated materials. Keep the prep area clean and free of oil, moisture, and debris. Contamination from a dirty floor or a shared brush can ruin an otherwise perfect prep.
Pro Tip: For aluminum and stainless joints, clean within 24 hours of oxide removal and allow the metal to acclimate to room temperature before welding. Cold metal draws moisture, and moisture means porosity.
Step-by-step weld joint preparation process
Having gathered all necessary tools and materials, you’re now ready to move step by step through weld joint preparation.
- Mark and align joint sections. Use soapstone or a scribe to mark cut lines and joint positions. Verify alignment using a square or straight edge before any cutting begins.
- Cut to dimension. Use plasma, saw, or shear to bring pieces to final size. Avoid flame cutting on stainless or aluminum whenever possible.
- Clean the base metal. Remove mill scale, rust, oil, paint, and coatings from at least 1 inch back from the joint edge. Use the correct solvent for the material, then follow with a wire brush.
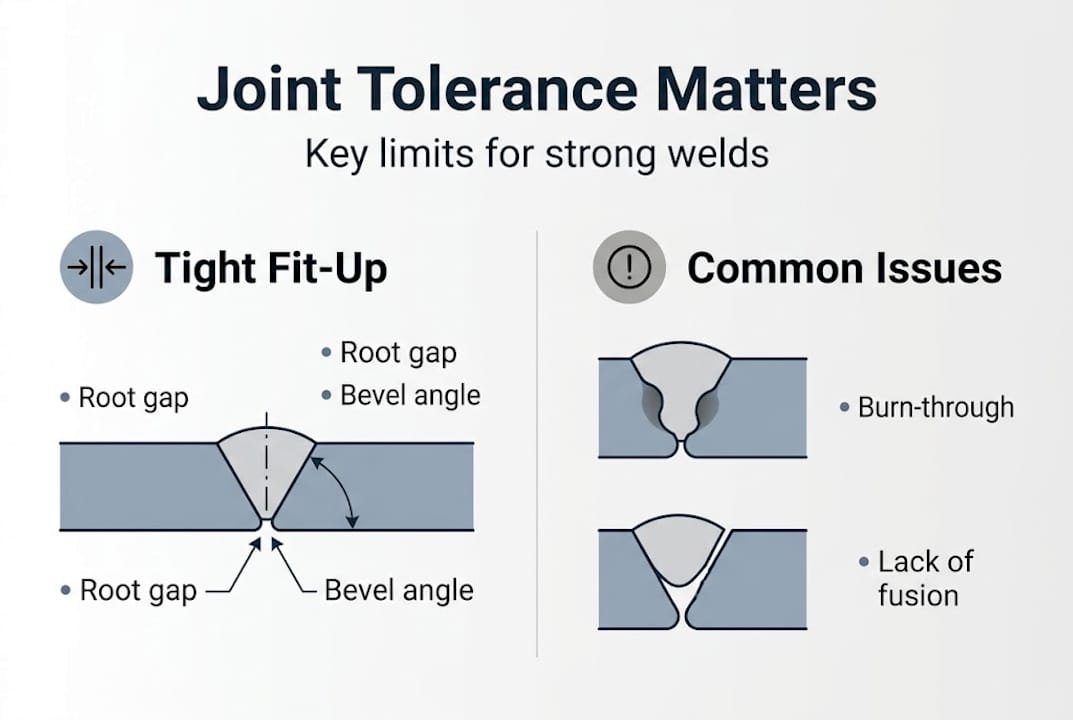
- Bevel the joint edges. Match bevel angle to the joint type and welding process. AWS D1.1 prequalified groove joints specify a Single-V groove at 60 degrees included angle, 0 to 1/8 inch root opening, and 0 root face max for SMAW. Bevel 25 to 35 degrees per side with a root face of 1/16 to 3/32 inch and root gap of 1/16 to 3/32 inch.
- Set the root gap. Use fit-up gauges or calibrated spacers. Do not eyeball it.
- Test fit before tacking. Dry-fit all pieces and verify gap, angle, and alignment before placing any tack welds.
- Tack weld in sequence. Place tacks at equal intervals to control distortion. Use the same filler metal you’ll use for the final weld.
Bevel angle reference by process
| Process | Included angle | Root gap | Root face |
|---|---|---|---|
| SMAW | 60° | 0 to 1/8" | 0 (max) |
| GMAW / MIG | 60 to 70° | 1/16 to 3/32" | 1/16 to 3/32" |
| GTAW / TIG | 60 to 75° | 0 to 1/16" | 0 to 1/16" |
For MIG welding, matching your MIG welding wire selection to the base metal and joint type is just as critical as the prep itself. The wrong wire chemistry on a properly prepped joint still produces an inferior weld.
Pro Tip: If your shop runs multiple processes, multiprocess welders for fabrication let you switch between SMAW, MIG, and TIG without changing machines, which keeps prep and execution tightly connected.
A well-prepped joint doesn’t just make welding easier. It makes every process parameter work harder for you, from travel speed to heat input to deposition rate.
Fine-tuning joint fit-up and tolerances
After basic prep, the next hurdle is achieving consistently tight tolerances and fit-up. This is where good shops separate themselves from great ones.
Fit-up tolerances are not suggestions. Gaps that are too wide lead to burn-through, excessive filler consumption, and weak root passes. Gaps that are too tight restrict penetration and cause lack-of-fusion defects. The target is a root gap within ±1/16 inch and a bevel angle within ±2.5 degrees. Grinding oxides between passes and holding these tolerances directly reduces fusion defects across the board.
How to check and adjust fit-up in the field
- Use a calibrated fit-up gauge or weld gauge set to measure root gap at multiple points along the joint.
- Check bevel angle with a protractor or digital angle finder.
- If gap is too wide, refit or add a backing strip where allowed by the WPS.
- If gap is too tight, use a grinder to open it incrementally. Do not force fit-up with clamps alone.
- For warped or distorted pieces, use strongbacks and clamps before tacking. Address the distortion, not just the symptom.
Tolerance comparison: acceptable vs. out-of-spec
| Parameter | Target | Out-of-spec result |
|---|---|---|
| Root gap | ±1/16" | Burn-through or lack of fusion |
| Bevel angle | ±2.5° | Incomplete penetration |
| Root face | ±1/32" | Excessive reinforcement or undercut |
| Joint alignment | ±1/16" offset | Stress concentration, cracking |
At the shop management level, standardizing prequalified AWS D1.1 details eliminates the need to requalify procedures for every new job. It also gives your welders a consistent target, which reduces defects and cuts qualification time significantly.
Pro Tip: Run test coupons at the start of each new material batch or joint configuration. It takes 15 minutes and can save hours of rework on production parts.
For low-hydrogen applications, using low-hydrogen welding rods in combination with tight fit-up tolerances dramatically lowers the risk of hydrogen-induced cracking in higher-strength steels.
Verification, post-prep, and the role of continuous improvement
Once fit-up is optimized, it’s time to verify prep quality and consider the benefits of ongoing improvements. Verification is not a formality. It’s the last line of defense before the arc starts.
Joint prep inspection checklist
- Root gap measured and within tolerance at all points
- Bevel angle confirmed with a gauge
- Joint surfaces free of oil, rust, scale, and moisture
- Tack welds placed correctly and free of visible defects
- Backing strip or backing gas in place if required by WPS
- Preheat applied if required by material and thickness
Post-prep tasks matter just as much as the initial work. Between passes, grind away oxides and slag before depositing the next bead. This is not optional on structural joints. Skipping it traps inclusions and creates stress points.
Research confirms that post-weld grinding improves fatigue strength in T-joints by delaying crack initiation, and narrow-gap grooves over 2 inches cut filler consumption by 30 to 50 percent while reducing residual stress.
That’s a significant performance gain from a step that costs nothing but a few minutes of grinding time.
Continuous improvement feedback loop for joint prep
- Document every defect by type, location, and joint configuration
- Review failed welds with the welder immediately after discovery
- Identify whether the root cause is prep-related or process-related
- Update prep procedures and train to the updated standard
- Re-run test coupons after any procedure change
- Track defect rates monthly and set reduction targets
Shops that treat joint prep as a living process, not a fixed checklist, consistently outperform those that don’t. The data tells you where to improve. You just have to collect it. Reliable multiprocess welders also make it easier to standardize your verification process across different joint types without switching equipment mid-inspection.
What most guides miss about real-world weld joint preparation
With the essential process laid out, let’s reconsider what truly separates great weld joint prep from the merely adequate.
Most guides treat tolerances as the finish line. Hit the number, move on. But in a real fabrication shop, heat cycles, material variance between heats, and production pressure all conspire to push joints out of spec in ways that a gauge won’t always catch in time. The best welders we’ve seen don’t just measure. They develop a feel for when a joint is right. That intuition comes from reviewing failed welds, not just avoiding them.
Rigid standard operating procedures have their place, but they can create a false sense of security. A welder who follows the SOP without understanding why each step matters will miss the edge cases every time. Continuous training that explains the reasoning behind each prep step builds the kind of judgment that catches problems before they become defects.
The most practical lesson from fabrication experience is this: prep failures almost never happen because someone didn’t know the rule. They happen because shop pressure shortened the process. Building a culture where prep time is non-negotiable, and where test coupons are routine rather than exceptional, is what actually moves defect rates down. Versatile welders for various joints support that culture by reducing equipment-related variables, so prep quality is the dominant factor in weld outcomes.
Equip your shop for flawless weld prep
If you’re ready to level up your shop’s joint preparation for even better results, Simpleweld has you covered. We stock the industrial-grade tools and consumables that professional welders and fabrication managers rely on every day.
For precision TIG work on critical joints, the Lincoln TIG welder delivers clean, controllable arc performance. For SMAW applications requiring low-hydrogen performance, the Simplestik #373 welding rod is a proven shop staple. And for fast, clean cuts during joint prep, ULTICUT cut-off wheels handle the workload without loading up or glazing over.

Frequently asked questions
What are the most common mistakes in weld joint preparation?
Skipping surface cleaning, setting an incorrect root gap, and poor fit-up alignment are the top mistakes that lead to weld defects. AWS D1.1 groove specifications exist precisely because small deviations in these areas produce consistently poor results.
How do you clean aluminum or stainless weld joints before welding?
Use mechanical or chemical oxide removal, complete it within 24 hours of welding, and allow the metal to reach room temperature before starting. Avoid carbon-arc gouging on these materials since it causes carbon contamination in the weld zone.
How tight must fit-up tolerances be for high-quality welds?
Aim for root gap and bevel tolerances within ±1/16 inch and ±2.5 degrees. Exceeding these tolerances consistently produces fusion defects that require costly repair or full joint removal.
Does post-weld grinding really improve fatigue strength?
Yes. Post-weld grinding delays crack initiation in T-joints and reduces residual stress, especially when combined with narrow-gap groove designs that also cut filler consumption by 30 to 50 percent.