

Most welders who struggle with TIG aren’t making obvious mistakes. They’re losing ground on the details: a slightly wrong tungsten prep, amperage that’s 10% off, or a process variant they’ve never tried. TIG welding (Tungsten Inert Gas, formally called GTAW or Gas Tungsten Arc Welding) is still the gold standard for clean, precise welds, but the reputation it carries as “slow and difficult” is increasingly outdated. Modern variants like pulse TIG, keyhole TIG, and A-TIG are closing the productivity gap with MIG faster than most shops realize. This guide covers the fundamentals, equipment, settings, advanced techniques, and troubleshooting strategies you need to get more from every arc.
Table of Contents
- The fundamentals of TIG welding
- Essential equipment and electrode preparation
- Mastering TIG settings for different materials
- Advanced TIG techniques and improving productivity
- Common challenges and expert troubleshooting
- Why TIG productivity myths are outdated and how to unlock true performance
- Upgrading your TIG welding: The right tools for the job
- Frequently asked questions
Key Takeaways
| Point | Details |
|---|---|
| Precision advantage | TIG welding offers unmatched control and quality for clean, high-integrity welds. |
| Electrode prep matters | Proper tungsten electrode preparation is critical for stable arcs and consistent weld quality. |
| Settings by material | Amperage and technique must be tailored to each metal for optimal penetration and minimal defects. |
| Techniques boost speed | Pulse, keyhole, and A-TIG processes dramatically increase productivity on thin and thick sections. |
| Troubleshoot, don’t guess | Systematic troubleshooting resolves most TIG welding issues and elevates results. |
The fundamentals of TIG welding
TIG welding uses a non-consumable tungsten electrode to create an arc, with a separate filler rod fed manually by the welder. An inert shielding gas, typically argon or an argon/helium blend, protects the weld pool from atmospheric contamination. The result is a clean, controlled weld with minimal spatter and excellent appearance. That level of control is exactly why TIG dominates aerospace, food-grade fabrication, and precision pipe work.
What sets TIG apart from MIG and stick isn’t just cleanliness. It’s the degree of operator control. You manage arc length, filler addition, and heat input independently, which means you can adapt mid-pass in ways other processes don’t allow. Understanding how carbon steel is made helps clarify why different base metals respond so differently to TIG heat input, especially when transitioning between mild steel and low-alloy grades.
Core strengths of TIG welding:
- Minimal spatter and post-weld cleanup
- Precise heat control for thin materials and root passes
- Suitable for a wide range of metals: steel, stainless, aluminum, titanium, copper alloys
- High-quality welds with excellent mechanical properties
- No flux required, reducing the risk of slag inclusions
The main challenges are real, though. TIG is slower than MIG, demands more operator skill, and requires both hands plus foot control working in coordination. For thicker sections, multi-pass requirements add significant time. That said, TIG’s precision over MIG is well established, and variants like A-TIG and keyhole TIG now directly address the productivity gap on thicker materials.
| Factor | TIG | MIG | Stick |
|---|---|---|---|
| Weld cleanliness | Excellent | Good | Fair |
| Precision | Highest | Moderate | Low |
| Speed | Slowest | Fastest | Moderate |
| Skill required | Highest | Moderate | Moderate |
| Best application | Thin/precision work | Production welding | Field/heavy work |
“TIG excels where quality cannot be compromised. For thicker sections where speed matters, advanced variants like keyhole TIG and A-TIG are changing the equation entirely.”
Essential equipment and electrode preparation
Understanding what sets TIG apart leads straight into assembling the right equipment and prepping electrodes for specific materials. A proper TIG setup includes more components than MIG or stick, and each one affects weld quality.
Core TIG equipment:
- TIG welder: AC/DC capable machine for multi-material use
- TIG torch: Air-cooled for lower amperage; water-cooled for high-amperage or extended runs
- Tungsten electrodes: Sized and typed for the material and current
- Filler rods: Matched to base metal chemistry
- Shielding gas: Pure argon for most applications; argon/helium for aluminum or thicker sections
- Foot pedal or fingertip control: For real-time amperage adjustment
- Collets, gas lenses, and cups: Consumables that affect gas coverage and arc stability
Tungsten preparation is where many experienced welders still lose ground. For DC welding (steel, stainless, titanium), you need a pointed tungsten ground longitudinally at a 20 to 30 degree taper. Circumferential grinding creates micro-grooves that cause arc wander. For AC welding (aluminum), the tungsten should form a balled end no larger than 1.5 times the electrode diameter.
Step-by-step tungsten prep for DC (steel/stainless):
- Select the correct tungsten type: 2% thoriated (red) or 2% ceriated (gray) for DC
- Mount the tungsten in a dedicated bench grinder, not a shared shop grinder
- Grind longitudinally along the length of the electrode, not across it
- Maintain a 20 to 30 degree taper, finishing with a small flat tip to prevent arc wander
- Inspect under magnification if available; the tip should be smooth and symmetrical
Step-by-step tungsten prep for AC (aluminum):
- Select pure tungsten (green) or zirconiated (white) for AC
- Start with a blunt or lightly pointed end
- Strike an arc on a scrap piece at your working amperage
- Allow the tip to form a consistent ball naturally; do not force it
- Confirm the ball is no larger than 1.5 times the electrode diameter before welding
| Current type | Material | Tungsten type | Tip prep | Max ball size |
|---|---|---|---|---|
| DC | Steel/stainless | 2% thoriated or ceriated | 20-30° taper | N/A |
| AC | Aluminum | Pure or zirconiated | Balled end | 1.5x diameter |
| DC | Titanium | Ceriated | 20-30° taper | N/A |
Proper tungsten preparation requires longitudinal grinding to a 20 to 30 degree taper for DC and a balled end for AC, always using a dedicated grinder to prevent contamination.
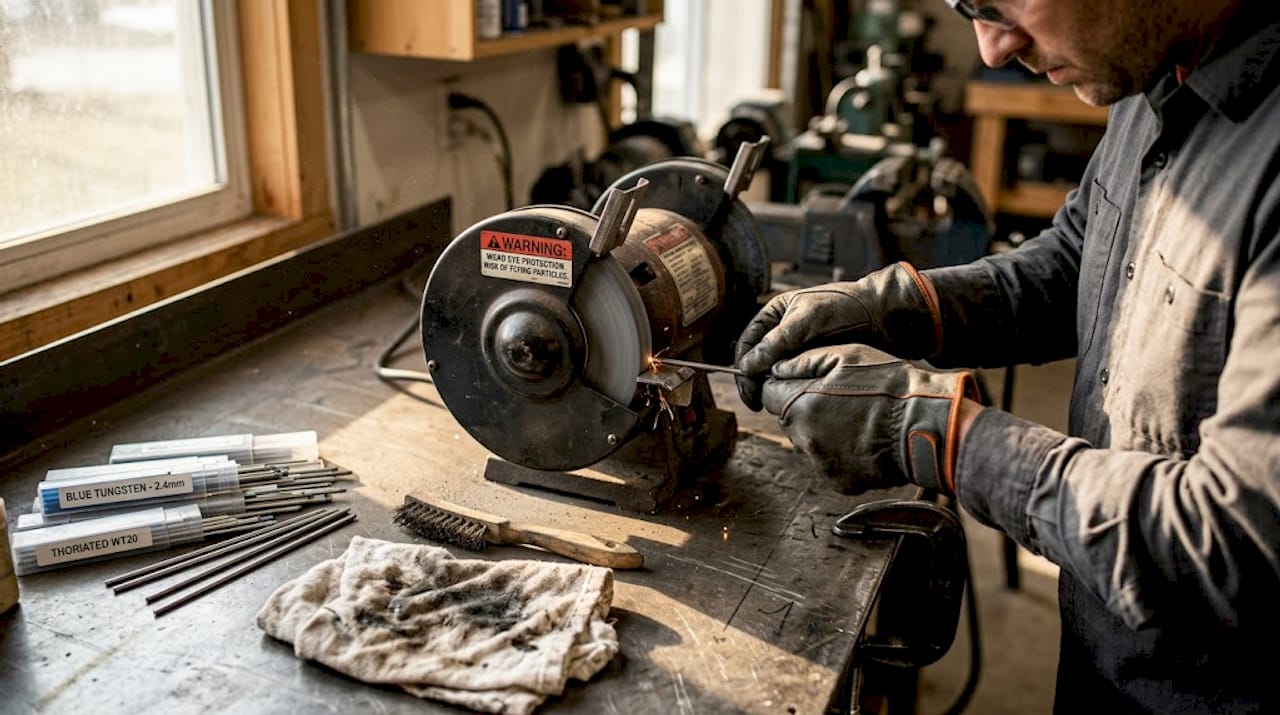
Pro Tip: Never use a shared grinding wheel for tungsten. Contamination from steel or aluminum particles on the wheel transfers directly to your electrode and into the weld pool, causing arc instability and inclusions that are nearly impossible to see until the part fails inspection.
Mastering TIG settings for different materials
With the equipment dialed in, the next major factor is setting the right parameters for each base metal. Getting amperage and heat input right isn’t just about penetration. It directly affects distortion, grain structure, and the mechanical properties of the finished weld.
A reliable starting point for steel is approximately 1 amp per 0.001 inch (or 1 amp per millimeter) of material thickness. So a 3mm mild steel plate starts at roughly 100A. Stainless steel conducts heat less efficiently and retains it longer, so you should reduce amperage by 10 to 15% compared to mild steel to prevent carbide precipitation and distortion. Aluminum is the opposite: it dissipates heat rapidly and requires 30 to 50% more amperage than steel at the same thickness.
Quick-reference TIG settings by material:
- Mild steel (3mm): 100A, pure argon, DC electrode negative (DCEN), ER70S-2 filler
- Stainless steel (3mm): 85 to 90A, pure argon or argon/2% nitrogen, DCEN, ER308L filler
- Aluminum (3mm): 130 to 150A, pure argon, AC, ER4043 or ER5356 filler
- Titanium (2mm): 80A, pure argon with back-purge, DCEN, ERTi-2 filler
Heat input management matters beyond just amperage. The formula is straightforward: heat input (J/mm) equals voltage multiplied by amperage, divided by travel speed. For 3mm 5083 aluminum, optimal heat input falls between 296 and 321 J/mm, with aluminum requiring 30 to 50% more current than steel at the same thickness. Staying within that window produces consistent fusion without the porosity or cracking that comes from overheating.
Pro Tip: When welding stainless, reduce your amperage slightly and increase travel speed rather than dropping voltage. Keeping heat input low minimizes the heat-affected zone and reduces the risk of sensitization, which weakens corrosion resistance near the weld.
Distortion is the other variable that settings directly control. Intermittent welding sequences, backstep techniques, and tacking at close intervals all reduce distortion on long seams. On aluminum specifically, preheating to 150 to 200°F for thicker sections helps stabilize the arc and reduce the amperage spike needed at the start of each pass.
Advanced TIG techniques and improving productivity
Once parameters are set for each application, next-level results depend on leveraging advanced process variants to handle edge cases and productivity demands. Pulse TIG, keyhole TIG, and A-TIG each solve specific problems that conventional TIG cannot address efficiently.
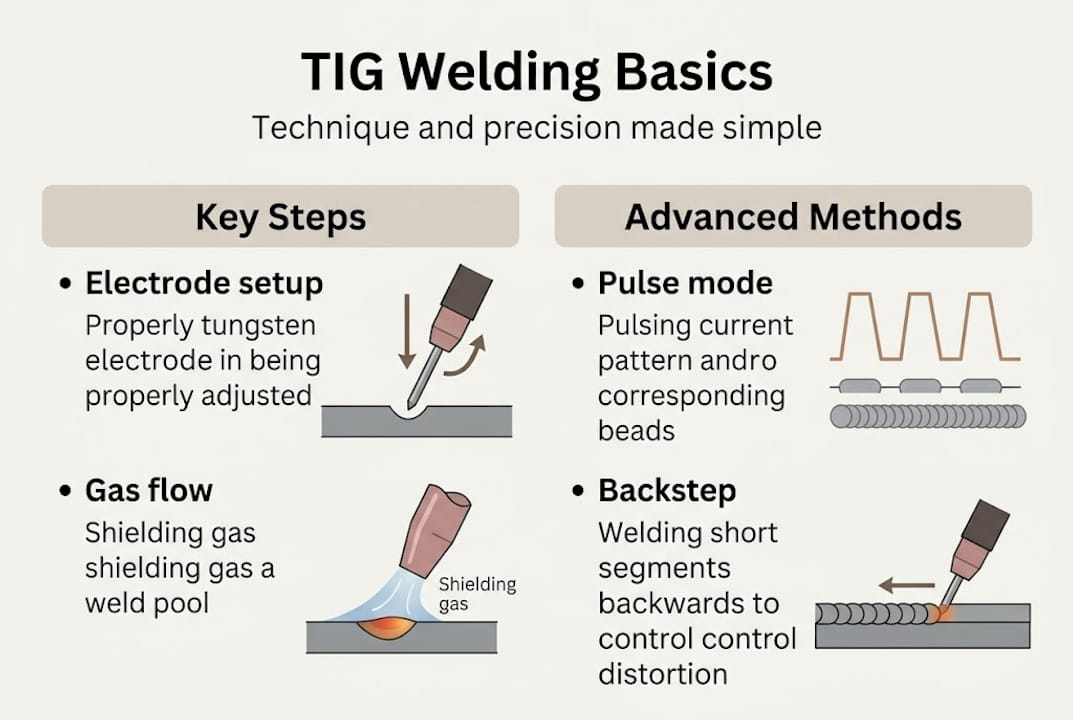
Pulse TIG alternates between a high peak current and a low background current at a set frequency. The peak current creates fusion and penetration; the background current lets the weld pool cool slightly before the next pulse. This cycle dramatically reduces average heat input, making it the go-to method for thin stock under 1.6mm where burn-through is a constant risk.
Using pulse TIG effectively:
- Set peak amperage to your normal working amperage for the material thickness
- Set background current to 25 to 35% of peak amperage
- Set pulse frequency: 1 to 10 PPS for manual welding; up to 100 PPS for automated or semi-automated passes
- Increase travel speed by 15 to 25% compared to conventional TIG at the same thickness
- Monitor the weld pool closely; the pulsing rhythm should be visible as a consistent ripple pattern
For thick sections, the productivity math changes. Conventional TIG on 10mm stainless steel requires multiple passes, precise interpass temperature control, and significant time. Thin materials under 1.6mm risk burn-through without pulse, while keyhole TIG achieves full penetration on 10mm stainless in a single pass versus seven passes with conventional TIG, a 97% time saving, and A-TIG reduces residual stress by 8% and distortion by 36%.
“Keyhole TIG and A-TIG aren’t exotic research tools anymore. They’re production-ready methods that require the right machine settings and process discipline to deploy effectively.”
| Method | Passes (10mm SS) | Distortion | Productivity |
|---|---|---|---|
| Conventional TIG | 7 | High | Low |
| Keyhole TIG | 1 | Moderate | Very high |
| A-TIG | 2 to 3 | Low (36% less) | High |
| Pulse TIG | Varies | Low | Moderate |
If your shop runs an all-in-one TIG system or a dedicated TIG and stick welder, confirm that your machine supports pulse frequency control before attempting high-frequency pulse TIG. A versatile multiprocess welder with built-in pulse capability gives you the flexibility to shift between methods without changing machines.
Common challenges and expert troubleshooting
Elevating technique isn’t enough without mastering troubleshooting for persistent TIG hurdles. Most TIG problems trace back to a small set of root causes, and fixing them systematically is faster than guessing.
Common TIG problems and their fixes:
- Burn-through on thin material: Reduce amperage, switch to pulse TIG with 30% background current, and increase travel speed. Materials under 1.6mm are especially vulnerable; pulse mode at 100 PPS with faster travel is the most reliable fix.
- Unstable arc: Check tungsten prep first. A contaminated or improperly ground electrode is the most common cause. Also verify gas flow rate (15 to 20 CFH for argon) and check for drafts or leaks in the gas line.
- Tungsten contamination: If the tungsten touches the filler rod or weld pool, it picks up base metal and loses its point. Break off the contaminated section, regrind using a dedicated grinder, and restart. Never try to burn off contamination by running high amperage.
- Lack of penetration: Increase amperage incrementally, slow travel speed, or check that your tungsten taper is correct. On aluminum, verify that AC balance is set correctly (typically 65 to 70% electrode negative for cleaning action without excessive heat).
- Porosity: Almost always a contamination issue. Clean base metal with acetone before welding, verify gas coverage, and check for moisture in the gas line or on the filler rod.
Pro Tip: Build a pre-weld checklist. Verify tungsten condition, gas flow, base metal cleanliness, and machine settings before striking an arc. Catching a contaminated tungsten before you start is far less costly than discovering it mid-pass on a critical joint.
When dealing with hard-facing materials or dissimilar metal joints, the troubleshooting process gets more complex. Always identify the base metals and their thermal properties before dialing in settings. Systematic troubleshooting, not intuition, is what separates consistent welders from inconsistent ones.
Why TIG productivity myths are outdated and how to unlock true performance
The persistent idea that TIG is only viable for small, high-value work is a product of a different era. It made sense when the only option was conventional multi-pass TIG on thick sections. It doesn’t hold up now.
Conventional TIG’s low productivity on thick sections is a real limitation, but keyhole and A-TIG variants offer deeper penetration with fewer passes. The catch is that they perform best with robotic or semi-automated systems and require precise heat input control to match the mechanical properties of conventional multi-pass welds.
The practical takeaway isn’t “buy a robot.” It’s that investing in process knowledge and the right machine capabilities returns more than adding another welder to the floor. Shops that master pulse settings, understand A-TIG activating flux chemistry, and select machines with genuine pulse control are outperforming shops that treat TIG as a fixed, slow process. The technology has moved. The question is whether your process has moved with it.
Upgrading your TIG welding: The right tools for the job
Putting advanced TIG techniques into practice starts with having a machine that can actually execute them. Pulse control, AC/DC switching, and precise amperage response aren’t features to compromise on.
The Lincoln Square Wave TIG welder delivers the AC/DC flexibility and arc control that multi-material TIG work demands, while the Miller Multimatic 215 TIG kit gives fabrication shops a single platform for TIG, MIG, and stick. Both are built for professional use and support the advanced techniques covered in this guide. Explore the full range of pro-grade welding equipment at Simpleweld.com, including tungsten electrodes, filler rods, gas lenses, helmets, and everything else your TIG setup needs to perform at the highest level.
Frequently asked questions
What does TIG stand for in welding?
TIG stands for Tungsten Inert Gas, a process using a non-consumable tungsten electrode and shielding gas to produce precise, clean welds across a wide range of metals.
Why is tungsten preparation so important in TIG welding?
Proper tungsten prep ensures arc stability and weld quality. Longitudinal grinding and a dedicated grinder prevent contamination that causes arc wander and weld inclusions.
How do I avoid burn-through on thin materials when TIG welding?
Switch to pulse TIG mode with a low background current and increase travel speed. Pulse at 100 PPS with 30% background current is effective for materials under 1.6mm.
What is the benefit of A-TIG or keyhole TIG vs. conventional TIG?
Both methods reduce pass count and total weld time significantly. Keyhole TIG completes 10mm stainless in one pass versus seven with conventional TIG, and A-TIG cuts distortion by 36%.
What amperage should I use for 3mm aluminum when TIG welding?
Start 30 to 50% higher than you would for steel at the same thickness. Optimal heat input for 3mm 5083 aluminum is 296 to 321 J/mm to achieve consistent fusion without porosity.