
If you use a bandsaw, you know how sensitive the blades can be. You also know that if your bandsaw blade breaks, it might cost you quite a bit to replace.
While the blades are meant to bend here and there, they should not break. Unfortunately, this ends up happening from time to time. However, buying a new saw blade isn’t your only option. Welding can save you some money and repair your favorite saw.
Keep reading to learn everything you need to know about welding bandsaw blades, including why you should do it and what you need to ensure your saws are as good as new.
What Are Bandsaw Blades?
Before learning what welding bandsaw blades entails, let’s first go over what exactly bandsaw blades are.
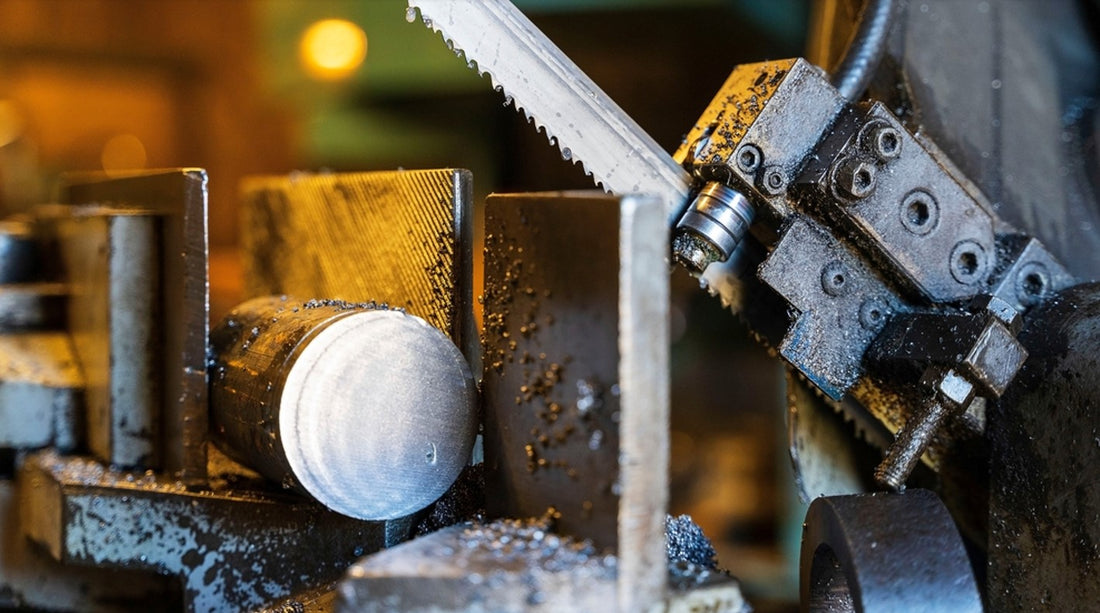
A bandsaw is a power saw that has a long, sharp blade. The blade has two wheels that spin a continuous band made out of toothed metal on the same plane to cut material.
There are many uses for bandsaw blades in a variety of industries. The industries you’ll most often find bandsaw blades used include:
- Woodworking
- Metalworking
- Lumbering
Bandsaw blades can cut various materials but are most often used to cut different types of wood and metal.
The downside to bandsaw blades is that they are prone to breaking. When your bandsaw blade breaks, you risk damaging your entire machine. Although it may seem like all is lost when you have a broken bandsaw blade, there are ways to repair it and get back to work. This is where knowing how to weld bandsaw blades comes in.

What Is Welding Bandsaw Blades?
Welding bandsaw blades is the act of repairing a bandsaw blade that has broken into two pieces.
You have a variety of options when choosing a welder for this purpose. The welder you choose depends on the type of welding you need and the blade material you need to weld.
For example, for welding sheet metal, choose an arc weld. Go with a MIG welder for thicker pieces of metal and TIG welding for welding thin metals.
For welding bandsaw blades, you can use a manual welder or an automatic welfare. Manual welders are recommended for experienced welders as they take more skill and precision. Automatic welders are easier to use and may potentially last longer. They also come at different price points, with automatic welders being more expensive.
Now that you know what bandsaw blades are and what welding bandsaw blades involve, let’s explain why you should be welding your bandsaw blades.
Why Is Welding Bandsaw Blades Important?
There are several reasons why you should weld a bandsaw blade. One of the top reasons to weld your bandsaw blades is to save money. This eliminates the need for a visit to the hardware shop every time your blade breaks.
As a result, you don’t only leave money in your pocket, but you also prolong the life of your bandsaw blade. It’s also a quick way to repair your bandsaw blade, meaning you won’t have to derail your project for too long.
Lastly, welding bandsaw blades will also improve your saw’s performance, preventing it from breaking again in the near future.
So how exactly do you weld a bandsaw blade? Let’s take a look.

How to Weld Bandsaw Blades
Although several steps are involved in welding bandsaw blades, you can complete the process with a few simple tools.
The first step in welding bandsaw blades is knowing precisely what you need to do so. The most important thing you’ll need is a TIG or MIG welder for the welding itself.
Other things you’ll need include:
- A welding vice
- Grinder
- Clamping device
- Hammer (to help tighten the welds)
- Welding safety products
- First aid kit
1. Remove the Blade from the Saw
The first step to welding bandsaw blades is to remove the old blade from the saw.
This step should be the easiest. There should be screws holding the blade in place. All you have to do is loosen the screws and pull out the saw.
2. Prepare Your Blade
Now that you’ve removed the blade, you need to understand its condition. You should understand the extent of the damage and check for any rust.
If there is any rust, it needs to be removed before you start welding. Once the rust is gone, clean the blade to remove oil or dirt so you can start with a clean blade.
Sometimes, a broken blade is beyond repair. If your blade is broken in several pieces or if there is a missing piece you can’t find, it may not be feasible to weld it.
3. Grind the Blade
The next step before welding the blade is to grind the edge. Grinding the blade is vital in ensuring that the broken bandsaw blade ends attach to each other and remain strong after welding. Grinding also contributes to strengthening the blade after welding.
4. Weld the Blade
The final step is to weld the two pieces of metal together using your blade welder. As a pro-tip, make sure that the weld is made on the back side of the blade so that it is not visible when installed in the saw.
To start the welding process, hold the blade in its position using a vice to avoid distortion after welding. Once complete, inspect both sides and touch up as needed. You may want to grind the weld smooth so that it doesn’t protrude from the blade and ensures less stress on the area.
Wrap-Up: Welding Bandsaw Blades
Knowing how to weld bandsaw blades is an important skill that will save you time and money if your bandsaw blade breaks.
However, to properly repair your blade, it’s essential to understand the welding process and have the patience to avoid making the damage worse.
Need some additional equipment to complete the job? Contact us today to place an order.