

Grinding metal sounds straightforward until you’re standing over a bench grinder watching sparks fly in the wrong direction and your workpiece overheating in front of you. Most metalworkers hit the same wall: inconsistent finishes, wheel glazing, heat discoloration, and nagging uncertainty about whether they’re doing it safely. This guide to grinding metal walks you through the full process, from picking the right tools and wheels to executing proper technique and verifying your results. Whether you’re preparing a weld seam or finishing a fabricated part, these methods will sharpen your results and your confidence on the shop floor.
Table of Contents
- Key takeaways
- Your guide to grinding metal: tools and equipment
- Step-by-step metal grinding techniques
- Troubleshooting common grinding mistakes
- Quality control after grinding
- My honest take after years at the grinder
- Get the right gear from Simpleweld
- FAQ
Key takeaways
| Point | Details |
|---|---|
| Match wheel to metal | Selecting the correct wheel type and RPM rating prevents breakage and uneven surface removal. |
| Hold the right angle | Grinding between 15 and 30 degrees delivers consistent material removal without burning the surface. |
| Inspect before every use | A ring test and visual check before mounting any wheel can prevent catastrophic failures mid-job. |
| Manage heat actively | Short work cycles and consistent tool movement stop heat buildup that damages surface integrity. |
| Pressure control is everything | Light, even pressure reduces disc clogging, extends abrasive life, and produces repeatable results. |
Your guide to grinding metal: tools and equipment
Before you touch metal, you need the right tools and you need to understand what each one does well and where it falls short.
Choosing the right grinder
Angle grinders are the workhorse of the fabrication shop. They handle weld grinding, deburring, surface prep, and cutting with the right attachments. Bench grinders give you a fixed, stable platform for sharpening tools, shaping stock, and removing scale. Dremel rotary tools handle detail work and tight spaces where an angle grinder would be dangerous. For laboratory and analytical work, lab mills are used to process metal samples, though grinding media selection matters here because steel media releases iron, chromium, and nickel into samples, which contaminates trace metal analysis.
Grinding wheel types at a glance
Choosing the best metal grinding tools starts with understanding what the wheel is made of and what it is rated to do. Here is a quick reference:
| Wheel Type | Bond | Best Use | Max Application |
|---|---|---|---|
| Aluminum oxide | Vitrified | Carbon steel, alloy steel | General grinding |
| Zirconia alumina | Resin | Stainless steel, hard alloys | Heavy stock removal |
| Silicon carbide | Vitrified | Cast iron, non-ferrous metals | Light to medium grinding |
| Diamond | Metal/resin | Carbide, ceramics | Precision surface work |
| Flap disc | Adhesive | Weld blending, finishing | Angle grinders only |
Always verify that the wheel’s RPM rating meets or exceeds your grinder’s free-running speed. ANSI B7.1 sets the standards for guard coverage, mounting practices, and speed ratings for abrasive wheels. More detail on grinding wheel types is worth reading before you place any order.
Safety gear you cannot skip
- Eye and face protection: A face shield over safety glasses, not just glasses alone
- Hearing protection: Angle grinders regularly exceed 100 dB at the operator’s ear
- Gloves: Cut-resistant, not standard work gloves
- Respiratory protection: Grinding steel, stainless, or coated metals produces fine particles that require at minimum an N95 respirator
- Wheel guards: OSHA requires wheel guards on all grinding operations, with no exceptions for “quick jobs”
Pro Tip: Inspect your wheel guard before every session. Guard openings must not exceed 1/4 inch for tongue guards and 1/8 inch for work rests, per ANSI B7.1 specifications. A gap any wider creates a projectile hazard if the wheel lets go.
Step-by-step metal grinding techniques
Knowing how to grind metal properly is about more than picking the right disc. The way you hold the tool, move it across the surface, and manage fatigue all determine whether you get a professional finish or a mess of burn marks and gouges.
-
Secure your workpiece. Clamp it firmly. Movement during grinding causes inconsistent pressure and can throw the tool unexpectedly.
-
Set your angle. The proper grinding angle sits between 15 and 30 degrees for most flat surface work. Too steep and you dig in. Too shallow and you lose cutting action and overheat the disc.
-
Start moving before contact. Bring the grinder to speed before the wheel touches the metal. Contact before full speed causes wheel loading and increases the risk of kickback.
-
Use pull strokes. Moving the grinder toward your body on the dominant axis gives you more control than pushing. You read the cut better and adjust pressure more naturally.
-
Apply light, consistent pressure. Let the abrasive do the cutting. Bearing down hard glazes the wheel faster, generates excess heat, and does not remove more material. Controlling pressure and abrasive usage reduces disc clogging and produces more even removal across the surface.
-
Keep moving. Never dwell in one spot. Dwelling causes the heat to spike in that zone, which can burn the surface or create a stress-weakened “white layer” in the metal.
-
Work in cycles. Grind for 30 to 60 seconds, then let the workpiece cool. For stainless steel or thinner gauge material, keep cycles even shorter. This is not just about protecting the metal. Fatigue affects your grip and pressure consistency, which directly affects finish quality.
-
Check your progress frequently. Stop, let things cool, and run your gloved hand across the surface. Uneven areas will be obvious before they become a rework problem.
Pro Tip: For weld grinding specifically, start with a 24 or 36-grit zirconia flap disc to knock down the weld bead, then step up to a 60 or 80-grit disc for blending. Trying to blend with a heavy disc wastes time and risks gouging the base metal.
One statistic worth keeping in mind: heat-induced surface changes from grinding can measurably reduce a component’s fatigue strength. For structural or load-bearing parts, excess heat is not just an aesthetic problem. It is a performance and safety issue.
Troubleshooting common grinding mistakes
Even experienced metalworkers fall into habits that quietly undermine their work. Here are the most common issues and how to address them.
“Grinding safety is a process step, not an option. Consistent pre-use checks reduce wheel failure incidents across every level of shop operation.” Grinding & Cutting JSA Template, JSABuilder
Using the wrong wheel type. Aluminum oxide wheels on stainless steel will contaminate the surface and create rust problems later. Stainless requires dedicated wheels, and those wheels should never touch carbon steel afterward. Mixing abrasives between metal types is a fast track to corrosion and warranty headaches on finished parts.
Side-loading cut-off wheels. Cut-off wheels are designed for straight cutting, not lateral pressure. Side-loading a cut-off wheel or exceeding its RPM rating frequently causes catastrophic failure, meaning the wheel shatters at speed and sends fragments toward the operator.
Skipping the ring test. Before mounting any vitrified grinding wheel, tap it lightly with a wooden mallet or the knuckle of your finger. A clear ringing tone means the wheel is intact. A dull thud means the wheel is cracked. Mount a cracked wheel and it will eventually let go under load.
- Disc clogging: Happens most often on aluminum and soft metals. Use open-structure wheels or discs rated for non-ferrous metals, and clean the face periodically during the job.
- Wheel glazing: Caused by too little pressure for the wheel’s hardness. Switch to a softer wheel grade or increase feed rate slightly.
- Surface burns: Blue or brown discoloration means the metal exceeded its tempering temperature in that zone. Reduce dwell time, increase movement speed, and add rest cycles.
- Inconsistent removal: Usually tied to variable grip pressure across operators or across a single session as fatigue sets in. Grinding variability from disc clogging and inconsistent pressure is one of the leading causes of rework in fabrication shops.
Quality control after grinding
Getting a good grind matters. Verifying it matters just as much.
Checking surface finish
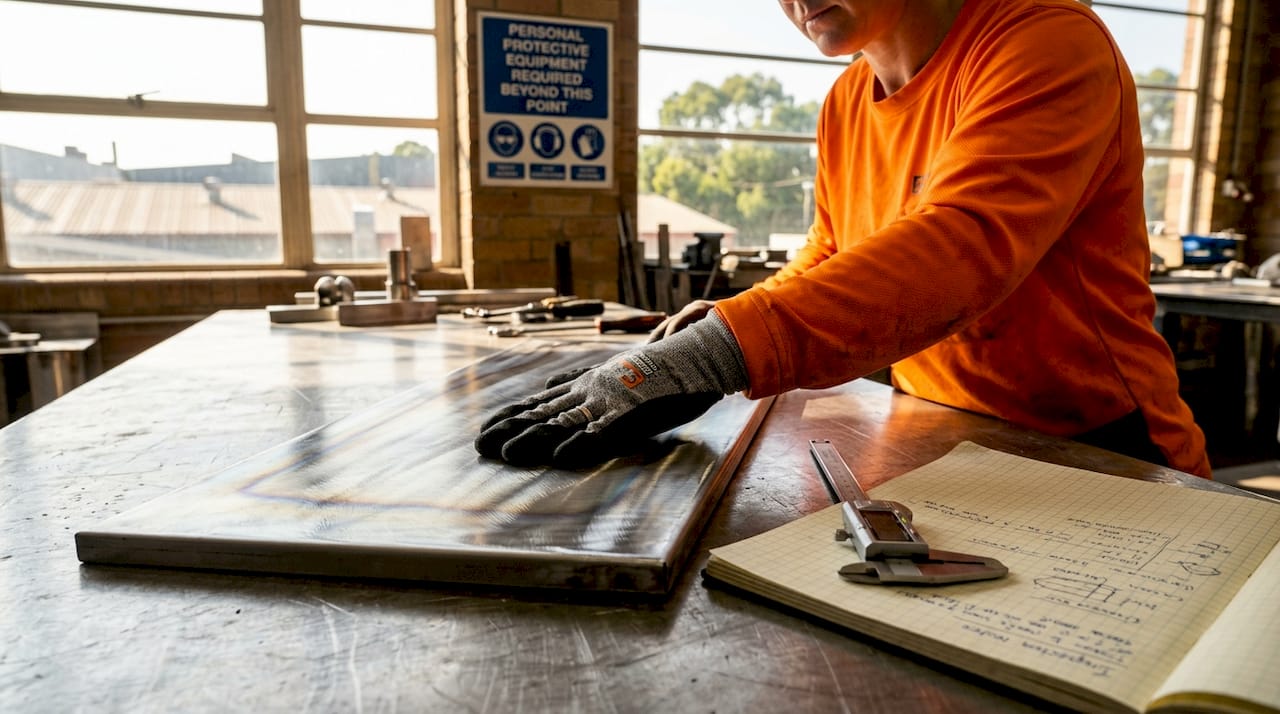
Run a clean cotton glove across the surface in multiple directions after the metal cools. Ridges, pits, or high spots will catch on the fabric. For work requiring a specific surface roughness, a surface profile gauge gives you a number to document and repeat. Visual inspection under a raking light source will reveal flatness issues that look fine under shop overhead lighting.
Wheel condition and replacement timing
| Indicator | What it means | Action |
|---|---|---|
| Glazed surface | Bond too hard or insufficient pressure | Dress wheel or switch grade |
| Uneven wear | Side loading or misaligned mount | Inspect spindle, correct technique |
| Visible cracks | Mechanical or thermal damage | Replace immediately |
| Reduced cutting rate | Wheel worn past effective depth | Replace wheel |
| Vibration increase | Out-of-balance wheel | Stop, inspect, replace if needed |
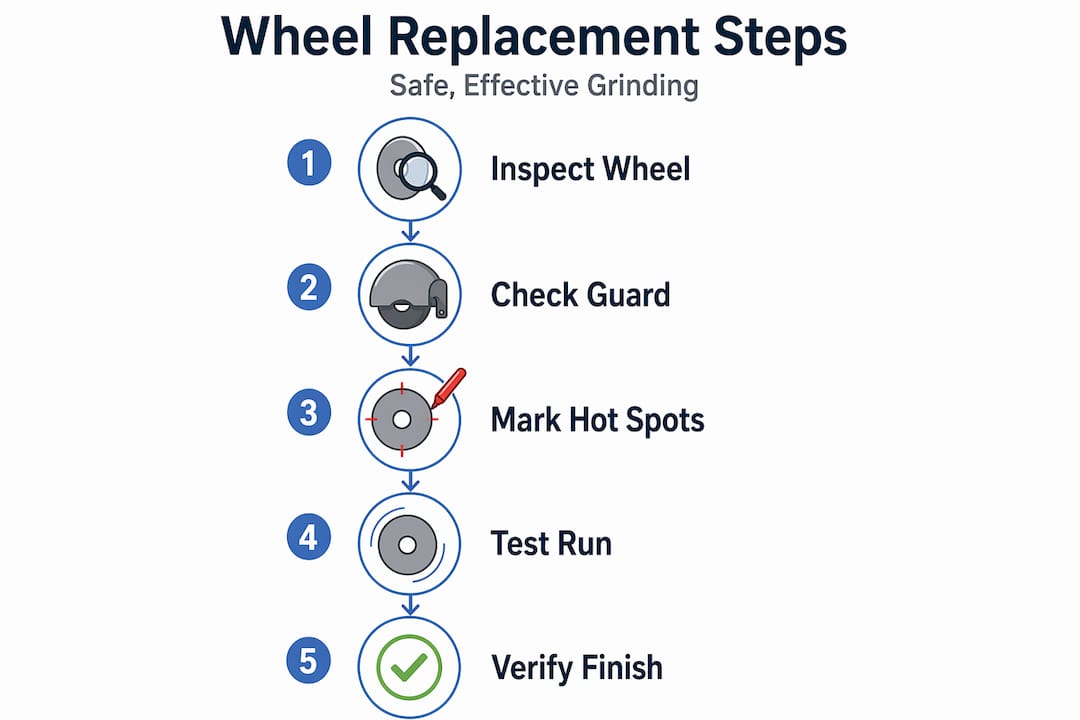
Pro Tip: Mark freshly ground metal with chalk or a paint marker on any area that showed heat discoloration. Those spots need to be re-evaluated before the part moves to the next process step. Heat-affected zones on structural components can have reduced fatigue strength that is invisible to the naked eye.
Routine equipment checks are part of how to grind metal properly, not an afterthought. Check spindle threads, flange condition, and guard positioning before each work session. A two-minute pre-use check is faster than a trip to the emergency room or a scrapped part.
My honest take after years at the grinder
I’ve watched a lot of people pick up an angle grinder and immediately apply too much pressure. The instinct makes sense. You’re trying to remove material, so more force feels like more progress. What actually happens is the disc loads up faster, you generate heat spikes, and the finish gets worse the harder you push.
The best lesson I learned came from a fabricator with 20 years on the floor who told me to “let the abrasive breathe.” Lighter pressure, consistent movement, and shorter cycles outperform heavy-handed grinding every time. It is not obvious until you see the comparison side by side.
I’ve also seen shops where safety checks were treated as bureaucratic busywork until a wheel failure changed that culture permanently. The ring test takes ten seconds. Pre-use wheel inspection takes thirty. Those two habits, done consistently, have more impact on shop safety than any posted sign or toolbox talk.
My other observation: most beginners focus entirely on which tool to buy and skip the technique entirely. The abrasive selection matters, yes. But a skilled operator with a mid-grade wheel will consistently outperform someone with top-shelf equipment and poor technique. Master the motion and the pressure first. Then refine your tooling.
— Taylor
Get the right gear from Simpleweld
Putting this guide into practice starts with having equipment that performs to the standard the job demands. Simpleweld stocks a full range of grinding wheels across grit levels, bond types, and metal-specific formulations, so you’re not guessing when you place an order. The same catalog covers welding tools and equipment from angle grinders to safety gear, with specs clearly listed so you can match wheel RPM to tool speed before anything ships. For shops that take grinding seriously, Simpleweld also carries dedicated safety gear including face shields, respirators, and cut-resistant gloves built for real shop conditions. Browse the full selection and get what you need to work clean, safe, and fast.
FAQ
What angle should I hold a grinder at when grinding metal?
Hold the grinder at 15 to 30 degrees relative to the workpiece surface. This range delivers consistent material removal without digging in or losing cutting efficiency.
How do I know if my grinding wheel is safe to use?
Perform a ring test before mounting any vitrified wheel. Tap it lightly and listen for a clear ringing tone. A dull sound indicates a crack, and the wheel must be discarded.
What causes metal to discolor during grinding?
Blue or brown surface discoloration indicates the metal exceeded its tempering temperature in that area. Reduce dwell time, keep the tool moving, and use shorter work cycles to prevent heat buildup.
Can I use the same grinding wheel on stainless and carbon steel?
No. Wheels used on carbon steel carry iron contamination that will cause rust on stainless surfaces. Always use dedicated, labeled wheels for stainless steel applications.
How often should I replace a grinding wheel?
Replace the wheel when you notice a significant drop in cutting rate, visible cracks, uneven wear, or increased vibration during use. A worn wheel works harder, generates more heat, and increases the risk of surface damage and operator injury.